Thursday, August 16, 2012

Homemade Mayonnaise


Homemade Mayonnaise

1 lg organic egg yolk*
1/2 tsp kosher salt
1 tsp water
1 tbsp lemon juice
1 cup sunflower oil (or canola oil)

Optional:
1/4 tsp pepper
1 packet stevia
Pinch of paprika

Combine yolk, salt, water and lemon juice in a medium sized bowl. Start whisking vigorously dripping the oil very slowly, in the beginning. Be careful not to incorporate too much oil initially or it will separate and you will have to start over. Continue whisking non-stop, using a towel under the bowl to stabilize it.

Slowly add more oil - you will see the mayonnaise start to thicken. Continue until all oil is incorporated and the mayo is thickened. Season with salt and pepper (and add additional lemon juice, if desired).

If using an immersion blender:
Place egg yolk, water, lemon juice, and salt in the bottom of an immersion blender cup. Pour oil on top and allow to settle for 30 seconds. Place head of immersion blender at bottom of cup and turn it on. Tilt and lift the head of the immersion blender until all oil is emulsified. Store in a sealed container in the refrigerator for a week.

*Pasteurized or irradiated eggs are safe to use in raw preparations - so be sure to use organic eggs to prevent risk of salmonella poisoning.

All photographs are actual pictures of the recipe listed, prepared by Virtually Everything Sweet, and cannot be used without the owner’s consent.

Saturday, August 4, 2012

Biscuits


One of the things I used to love about my childhood was family time. Grandmothers are often the glue that holds the family together and the Johnson family was no exception. My grandmother used to gather everyone together on Sundays and holidays so we could enjoy family time. And sadly, since her transition, those moments of family, food and fellowship rarely take place any longer.

During my childhood, I spent a lot of time at my grandmother's house. I must say that initially I would go with dread, because as a young child I always wanted to go outside to play. And there were no kids around her house, nothing to do in her neighborhood and just not many things to get in to, other than the sweets she always kept around the house. To make bad matters worse, my piano instructor lived across the street from her. And I always felt like I had to hide from her lest she make me come over and start rehearsing for my next audition. Because there was nothing for a young person to do, I ended up spending a lot of time bonding with Nana at the kitchen table, watching her tidy up around the house and learning how to find my way around the kitchen.

My grandmother was a serious baker and did most, if not all, of her baking from scratch. I used to love watching her cook and bake. Breakfast at her house would often consist of homemade cinnamon buns, biscuits, scrambled eggs, livermush, grits and/or applesauce.

So today I had a healthier version of grandma's breakfast and, I must say, my biscuits might give Nana a run for her money! She would be proud.


Buttermilk Biscuits

2 c all-purpose flour
1 tbsp baking powder
1 tsp sugar
1/2 tsp salt
1/2 c (1 stick) cold unsalted butter
3/4 cup of buttermilk


Whole Wheat Biscuits

2 c white whole wheat flour
4 tsp baking powder
1/2 packet stevia
1/2 tsp salt
1/4 c cold unsalted butter
1 c milk (I used unsweetened hemp milk)

Preheat oven to 425 degrees. Mix flour, baking powder, sugar, and salt together. Cut the stick of butter into pieces, and work into the flour mixture with your hands or a pastry blender until it resembles pea-sized crumbs. Add milk, mixing until a bit loose and sticky.

Pour dough out on a floured surface and knead for a minute. Create ball with dough and roll it out. Do not knead too much or biscuits will be tough.

Using a round cutter, cut out your biscuits and place on baking sheet. Do not twist cutter from side to side when cutting biscuits. Bake until tops are browned, about 12-15 minutes. Brush each biscuit with melted butter and serve warm.


Spending time with Nana, having Sunday and holiday dinners, catching episodes of the Edge of Night and As The World Turns at the kitchen table, watching how she cooked with love and soul...and not to mention the soft peppermint sticks and Brach's candy mix in her living room candy jar...Priceless.

All photographs are actual pictures of the recipe listed, prepared by Virtually Everything Sweet, and cannot be used without the owner’s consent.

Friday, August 3, 2012

Red Beans and Rice


Popeye's Chicken just opened in Charlotte - and in the mall no less. All day long I kept hearing about people going to partake in the fried chicken and red beans and rice. So that has somehow influenced me to prepare my own red beans and rice today, along with some buttermilk cornbread.

Brown rice, unless it is wild rice, is not one of the favorite items on my clean eating list. I am not a fan of the grainy, firm texture. I don't like soggy rice; but I do like for it to be fluffy as opposed to firm. However, I decided to try a brand of brown basmati rice from Trader Joe's that turned out to be perfect for this dish. Even better, it cooks in 15 minutes, whereas most brown rice has to cook for at least an hour.


Brown rice is nutritious, a good source of energy, contains fiber and is fat burning!

Red Beans and Rice

2 tbsp olive oil
2 garlic cloves, diced
medium yellow onion
1 small  green bell pepper, diced
1/2 c red pepper, diced
2 celery stalks, diced (optional)
1/4 c parsley
1 tsp cumin
1/2 tsp paprika
Salt and pepper, to taste
1/4 tsp cayenne pepper
1 tsp crushed red pepper flakes
1 pound dried red beans, soaked overnight 
4 cups water
2 cup chicken stock
1/2 pound andouille sausage, sliced


Cooked white or brown rice
Green onions, garnish

Heat oil and sautée garlic, onion, green and red pepper and celery for 3-5 minutes. Add seasonings and beans.  Simmer for 15-20 minutes. Add andouille sausage.  Cover and simmer for 30 minutes. Remove from heat. Serve over rice. Garnish with green onions.

All photographs are actual pictures of the recipe listed, prepared by Sweet Treats 'n Good Eats, and cannot be used without the owner’s consent.

Monday, July 30, 2012

Deviled Eggs


Deviled eggs are one of my favorite appetizers but I have not had any since I began my clean eating journey because I no longer eat mayonnaise. That was until I started making my own. It is easier than you'd think and you can add your own ingredients to give it some extra pop.

If you don't have mayonnaise, or don't want to try your hand at it, you can substitute Greek yogurt for mayo as well.

Homemade Mayonnaise

1 lg organic egg yolk*
1/2 tsp kosher salt
1 tsp water
1 tsp lemon juice
1 cup vegetable oil (or canola oil)

Combine yolk, salt, water and lemon juice in a medium sized bowl. Start whisking vigorously dripping the oil very slowly, in the beginning. Be careful not to incorporate too much oil initially or it will separate and you will have to start over. Continue whisking non-stop, using a towel under the bowl to stabilize it.

Slowly add more oil - you will see the mayonnaise start to thicken. Continue until all oil is incorporated and the mayo is thickened. Season with salt and pepper (and add additional lemon juice, if desired).

*Pasteurized or irradiated eggs are safe to use in raw preparations  - so be sure to use organic eggs to prevent risk of salmonella poisoning.


Deviled Eggs, Healthier version

12 lg hard-boiled eggs, sliced in half, lengthwise
1/2 c plain Greek yogurt
1 1/2 tsp mustard powder
Dash of apple cider vinegar
1-2 packets Stevia, to taste
1 tbsp red pepper, diced
Salt and pepper, to taste

Garnish:
1 tbsp green onion, minced
Paprika
 

Deviled Eggs

12 lg hard-boiled eggs, sliced in half, lengthwise
1/4 c mayonnaise 
1/4 c pimento
tsp Dijon mustard
Salt and pepper, to taste
1-2 tbsp sweet relish

Garnish:
Paprika

Fill large pot with water. Add a dash of white vinegar to the water, to prevent leaking if eggs crack during boiling. Boil eggs for about 15-18 minutes. Crack eggs under cool water, while still warm, so the shells are easy to remove.

Slice each egg lengthwise in half. Gently remove yolks and place in  bowl; whisk yolks until smooth. Stir in remaining ingredients until combined.

Spoon (or use pastry bag) to fill egg-white halves. Garnish with paprika and green onion. Cover and refrigerate until ready to serve.


All photographs are actual pictures of the recipe listed, prepared by Sweet Treats 'n Good Eats, and cannot be used without the owner’s consent.

Black Bean Soup


Black beans are packed with fiber and protein and will keep you feeling full for hours. They help to regulate your body's glucose level throughout the day, which means your metabolism will be chugging away at top speed, burning through any extra calories you've taken on so that you can stay slim and trim. (Taken from Yahoo! Health)

Black beans are one of the highest in flavonoids of all the beans. Research shows that flavonoids may thwart the storage of excess tummy fat. Black beans aid in benefiting your digestive tract, blood sugar regulation, cancer prevention, and cardiovascular and nervous system health.

This is a simple soup recipe. You can buy dried black beans and soak them overnight or use canned beans for a quick and dirty substitution.

To soak:
Place your black beans in a pot along with enough water to cover them and stand about two inches over the top of the beans. Let the beans sit for at least eight hours before cooking. Or, for a quick soak, bring beans to a boil for two minutes, remove from heat and let them sit for two hours before cooking.

Black Bean Soup

2 tsp olive oil
Half of a small onion
1 garlic clove
2 15 oz cans black beans – drained and rinsed
1  - 1 1/2 c chicken stock

1/2 tsp red pepper flakes
Dash of paprika
1 tsp ground cumin
salt and pepper to taste
1 tsp lime juice


Garnish:
1/2 tbsp Greek yogurt
1 tsp lime juice
Scallions

Heat olive oil in a medium sized pot and cook onion until translucent. Add garlic and cook for a minute longer. Remove from heat. Add 1 can of rinsed black beans to the pot, along with seasonings and lemon juice. Combine.

Place the other half of rinsed black beans in a blender with the chicken stock. Blend until smooth. Pour blended soup into pot and heat over medium heat. Add additional salt and pepper, if needed.

In a small bowl, combine Greek yogurt and lime juice until smooth and swirl over the soup; garnish with scallions.

All photographs are actual pictures of the recipe listed, prepared by Sweet Treats 'n Good Eats, and cannot be used without the owner’s consent.

Tuesday, June 19, 2012

Celery Soup


I had a wonderful day with my dad this Father's Day and after we kicked back to relax for a bit, we got into a conversation about healthy eating and juicing and all kinds of good stuff I could have talked about for hours. So he tells me he was dining out and had this celery soup the other week that was to die for.

He went back home and attempted to duplicate the soup he had eaten at the restaurant but said it was not exactly what he was looking for. So we tried to think of what could have been missing in his soup and I think he was missing the addition of the potato. It sounded pretty good and I kept thinking of all of this celery I had in my own fridge. You see where this is going, right?

I am not a big fan of pureed soups. Well, at least I did not think I was. I am a beans, meat and potato soup type of gal. But, I made this soup for tonight's starter and it was a home run.

Celery Soup

1 tbsp olive oil
1 finely chopped small yellow onion
1 garlic clove, minced
6-8 stalks celery
1 small Russet potato
3-4 cups chicken or vegetable stock
3 tbsp hemp milk (or substitute half and half or heavy cream)
Salt and pepper, to taste


Optional:
2 tbsp Greek yogurt
1 tsp minced tarragon (or substitute thyme)

Heat olive oil in large pot over medium-high heat. Add onions and saute 2 minutes. Add celery, potato and garlic and saute for 2 minutes. Add stock and bring to boil. Reduce heat; cover and simmer until vegetables are tender, 10-15 minutes.

Remove soup from stove top and place in blender. Puree until smooth.  Pour soup through a sieve, using the back of a ladle to extract as much of the liquid as possible. Return puree to pot. Stir in milk and seasonings.

In a small bowl, mix Greek yogurt and fresh tarragon (or thyme) in small bowl. Drizzle each serving with yogurt sauce. Or drizzle soup with olive oil. Serve hot.

All photographs are actual pictures of the recipe listed, prepared by Sweet Treats 'n Good Eats, and cannot be used without the owner’s consent.

Sunday, May 27, 2012

Popovers


One of the things I miss most with my new eating plan is not being able to savor the taste of hot bread with some cold butter slathered on the top. I purchased a Sunbeam bread maker some years ago and used to make my own challah, cinnamon raisin bread and whole wheat bread...and now it is sitting collecting dust. A pure tragedy.

Earlier this year, I was dining at a restaurant called BLT Steak and we were served popovers before our meal. It's difficult for me to eat dinner out because I never know what ingredients are in the food - so when it comes to stuff like that, I just pass the basket. But I later realized  you can make popovers without yeast...just flour, salt, milk and eggs.

Using alternative milk and flours does not always produce the same results when baking. But this morning I was going to find out. I prefer sweet breads so I used almond milk instead of whole milk and added some orange zest.

So what makes a popover "pop"? The high proportion of liquid in the batter creates steam that causes the popovers to puff up. In order to have perfect popovers DO NOT PEEK. Never open the oven until the popovers are finished baking. If you don't own a popover tin, you can make these in a regular muffin tin; they just won't be as tall and as pretty. When you remove popovers from the oven, unmold and place onto a rack. Pierce the sides with the tip of a sharp knife to let steam escape - this will keep the exterior crisp and prevent the popovers from collapsing.


Popovers

3 tbsp melted butter, divided
3 eggs
1 c milk, heated for 45 seconds (or substitute hemp, rice or almond milk)
1 c all-purpose flour (or substitute white whole wheat flour)
1/2 tsp kosher salt
1 packet Stevia

Preheat the oven to 450 degrees F.

Preheat muffin tin by placing it in oven for 10-15 minutes prior to baking.

In a blender or food processor, mix the eggs until pale yellow. Add the warm milk and blend. Add the remaining ingredients (with the exception of 1 tbsp butter) and blend. Brush the remaining butter on the muffin tins. Pour the batter into the warmed tins and return it to the oven.

Bake at 450 degrees for 20 minutes. Reduce the oven temperature to 350. Bake 20 minutes longer or until golden brown. Serve warm.


Cheesy Popover

If you want a heartier popover, use whole milk, and add the following:

1/4 c grated Cheddar
1/4 c grated Parmesan
2 tbsp chopped chives
1 tsp paprika


If you want to sweeten the bread, you can add a tsp of orange zest to the batter and this cinnamon sugar to the top:

Cinnamon Sugar

1/2 c sugar
1 tsp ground cinnamon
1/4 c unsalted butter, melted

Brush tops of popovers with cinnamon sugar mixture and serve warm.

All photographs are actual pictures of the recipe listed, prepared by Sweet Treats 'n Good Eats, and cannot be used without the owner’s consent.

Thursday, May 24, 2012

Cinnamon Oatmeal Smoothie


Having trouble rolling out of bed in the mornings in time to make breakfast? Need something quick to fill you up and start your day? Try either of these oatmeal smoothies, packed with fiber, healthy fats and protein. Almost tastes like eating oatmeal cookies n' cream for breakfast!

Benefits of eating rolled oats:
  • Provides high levels of protein and fiber, which will keep you feeling full and satisfied.
  • Has positive effect on cholesterol levels.
  • Contains lignans which protect against heart disease and cancer.
  • Contains antioxidants beneficial for heart disease.
  • Boosts immune system.
  • Stabilizes blood sugar.
  • Gluten friendly.
  • Protects against breast cancer.
Cinnamon Oatmeal Smoothie

1/4 c rolled oats, uncooked
1 c almond coconut milk
2 tbsp plain Greek yogurt
1/2 tsp ground cinnamon
Dash of turmeric
1 tsp agave nectar (or 1 packet stevia)
1 apple, cored
3/4 c ice cubes


Oatmeal Smoothie #2

1/2 c rolled oats, uncooked
1 tbsp almond butter (or peanut butter)
1 c almond milk
1 tbsp flax seeds
3/4 c ice
1 tsp vanilla extract, optional
1 packet stevia

Combine all ingredients in blender until smooth. Sprinkle with cinnamon, if desired.

All photographs are actual pictures of the recipe listed, prepared by Sweet Treats 'n Good Eats, and cannot be used without the owner’s consent.

Tuesday, May 22, 2012

Dutch Baby (German Pancake)


I was running so much this weekend that I did not get to have my traditional Saturday morning breakfast, which usually consists of pancakes or waffles. I went to the gym Saturday morning and ran out the door with a strawberry smoothie. And Sunday I slept through breakfast. I know...I know...it was a long weekend. So this morning I wanted to start my day off with a Dutch baby pancake.

I am not sure why the name Dutch baby bothers me so - but it is quite a delightful and filling breakfast treat. It is extremely simple to make and can be dressed up with powdered sugar, fresh fruits, fruit compotes or with just plain maple syrup. I love the crunchy edges and the soft center...reminds me of eating a funnel cake.


A Dutch baby is also known as a Poffertje, a German pancake, a Bismarck, or a Dutch puff.  It is baked in a cast iron skillet or a metal pan, puffs up during baking, and falls soon after being removed from the oven.

Make sure your ingredients are room temperature if you are cooking your Dutch baby in a cast iron pan or you will crack the surface.

Dutch Baby

2 tbsp sugar
3 large eggs
1/2 c whole milk
1/4 c all-purpose flour
1/4 c whole wheat pastry flour
1 tsp vanilla

1/4 tsp of cinnamon
Dash of nutmeg

Dash of salt
1/2 stick unsalted butter + 1 tbsp unsalted butter


Fruit topping:
1 large apple, cored and cut into 1/2 inch slices
Dash of brandy
1/4 tsp cinnamon
Powdered sugar, for serving (optional)


Place a 10 inch cast iron skillet on the middle rack of your oven and preheat the oven 450 degrees F.

Add the eggs to blender and whisk until pale and fluffy. Blend in the remaining ingredients.

Add 1/2 stick of butter to the cast iron skillet and swirl to melt. Quickly pour the batter into the skillet and place it into the oven, baking the pancake for about 18-25 minutes, until puffed.


As the pancake is cooking, add one tablespoon of butter to skillet and heat it. Add the apples, brandy and cinnamon and cook for about ten minutes, until they caramelize. Once the pancake is finished, pour apples on top and sprinkle with powered sugar.


Dutch Baby (healthy alternative)

2 eggs
2 packets Stevia
1/2 c almond or coconut milk
1/2 c white whole wheat flour (or spelt flour)
Dash of salt
1/8 tsp nutmeg
1/4 tsp cinnamon
2 tbsp melted butter + 2 tbsp more for pan
1 tsp of orange zest
Fresh fruit, for serving (optional)

Place 5 inch cast iron skillet in the middle rack of your oven and preheat to 450 degrees F.

Add the eggs to blender and whisk until pale and fluffy. Blend in the remaining ingredients.

Add 2 tbsp butter to the cast iron skillet and swirl to melt. Quickly pour the batter into the skillet and place it into the oven, baking the pancake for about 18-25 minutes, until puffed.

All photographs are actual pictures of the recipe listed, prepared by Sweet Treats 'n Good Eats, and cannot be used without the owner’s consent.

Monday, May 21, 2012

Pomegranate Sorbet


It's the time of year to enjoy cool, refreshing treats. One of my favorites is pomegranate sorbet.

What I love about sorbet is that it will typically satisfy my taste for something sweet, but without the heaviness. Since I am on a sugar free diet, ice cream has been more challenging for me to make, as stevia crystallizes differently than granulated sugar. So if I wait too long to eat my frozen treats it is hard as a rock! But for those who eat whatever they desire, this simple recipe is for you.

I get a lot of questions about making ice cream and yes, you can make sorbet and ice cream without an ice cream maker. But I highly recommend the Cuisinart Pure Indulgence ice cream maker. Once you realize how simple it is to make your own ice cream, you will wonder why you waited so long to get one.

I just keep the bowl in the freezer at all times so whenever I am ready for some sorbet or ice cream, it is ready to go! Easy as 1...2...3!

Pomegranate Sorbet

Simple Syrup:
1 c sugar
1/2 c water
1 c fresh mint leaves

In a small saucepan, combine ingredients over medium heat. Bring to a boil. Reduce heat and simmer for 5 minutes or until the sugar has dissolved. Cool and strain before using in ice cream machine.

Sorbet:
1 c simple syrup
2 c pomegranate juice
1 c orange juice,  no pulp
1 tbsp of Red Berry Cîroc or orange liqueur

Combine the ingredients in a pitcher or large glass bowl. Pour mixture in an ice cream maker and freeze according to the manufacturer's instructions, approximately 20-25 minutes.

Refrigerate for 1-2 hours before serving.


All photographs are actual pictures of the recipe listed, prepared by Sweet Treats 'n Good Eats, and cannot be used without the owner’s consent.

Tuesday, May 1, 2012

Tropical Citrus Smoothie


T-minus one week for the 40th birthday madness! I have a girlfriend who bought a Vitamix last year and has been raving about how everyone must have one in their kitchen. She feels for her Vitamix the way I feel for my Kitchenaid mixer and Cuisinart ice cream maker. I was so going to get one until I saw how much it costs...about $500.00. Well the reason being is that the Vitamix is what many restaurants and coffee shops use. I think I am doing restaurant quality stuff in my kitchen but I don't necessarily have to have what Smoothie King and Starbucks use. The Vitamix is a high performance blender that makes hot soup, blends smoothies, makes sorbet and soft serve ice cream...even scrambles eggs. Well, it should for that price.

So I started doing research on other blenders that I might be interested in that would do all the things the Vitamix did. And I found my perfect birthday present, the Ninja 1100. I was working out on the treadmill a few Saturdays ago when I saw this infomercial for the Ninja Kitchen System. There just had to be a reason I was in the gym at that moment, looking up at the screens, which I normally don't do. The Ninja 1100 makes smoothies, dips, soft serve ice cream and sorbet, processes and dices food, makes dough...in fact, the only thing it did not do was make hot soup and scramble eggs. You can process soup in the blender and heat it up afterwards; but other than those two things, it is perfect. More importantly, it was $159.80.

I have discovered my new favorite thing.

Since it arrived on Saturday I have made cucumber mint ice cream, green smoothies, banana shakes, orange carrot slushies, strawberry/cranberry smoothies, hummus...this was just what the doctor ordered.

So today I am feeling a little under the weather and I am wondering if it is all of the smoothies and the sugar content in the fruit or if it is the sudden change of weather, from 60 to 90 degrees overnight. Either way, I have to get it together because next week I will need all the energy I can muster! I thought perhaps I needed a little Vitamin C to give my immune system a boost. So I made a tropical citrus smoothie - a cool, refreshing treat.

Tropical Citrus Smoothie

1 medium orange(s), peeled and chopped
1 small lime, peeled and chopped
1 small lemon, peeled and chopped
1/2 c coconut milk, unsweetened
1 tsp fresh ginger, minced
1 packet stevia or 1 tsp agave nectar
1 c ice

Add ingredients to your blender. Process until well blended. Serve immediately.

All photographs are actual pictures of the recipe listed, prepared by Sweet Treats 'n Good Eats, and cannot be used without the owner’s consent.

Monday, April 9, 2012

Homemade Whole Wheat Tortillas


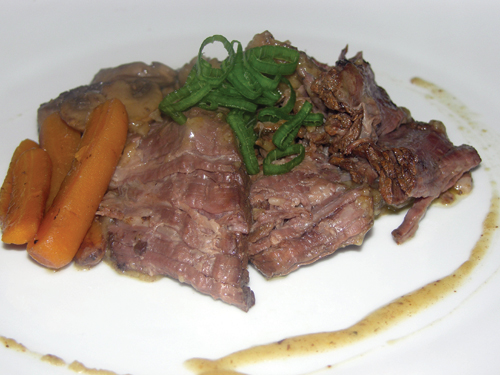
I am stuck with a few leftovers from yesterday's dinner and wanted something different. So I am using my pot roast in some tortillas for lunch.

I discovered a cheese alternative a few months ago that I was very pleased with. But since that time, I have stumbled on one that I enjoy even more and that melts better on pizzas and quesadillas. It is called Vegan Gourmet Mozzarella. Most dairy alternatives do not last as long as your typical dairy products so you need to use this cheese fairly quickly - or shred and freeze it. This cheese is vegan and gluten free and has no casein, which is the protein in cow's milk that causes those globs of mucus to get stuck in the back of your throat...well in mine anyway.

These tortillas can be made with corn, all purpose, whole grain or white whole grain flour. I did not have time to go through the process of making an actual quesadilla so I just took the roast, added some peppers, onions, cheese and arugula, rolled it up and drizzled it with some balsamic vinegar.


Whole Wheat Tortillas

1 1/2 c white whole-wheat flour (or whole wheat flour)
1 tsp salt
4 tbsp unsalted butter, frozen
3/4 c very warm water (or milk)

Cut butter into small cubes. Set aside momentarily. Mix flour and salt in food processor. Add butter and pulse a few times, until crumbly. Add liquid and pulse until dough forms into a ball.

Remove dough and place onto a lightly floured surface and lightly knead. Add a little more flour if needed. Dough should be soft.

Divide dough into 8 portions. Flatten dough into disks and sprinkle with flour. Cover with a kitchen towel and let rest for approximately 10 minutes. On a floured surface, roll disks into circles.

Preheat griddle (or large skillet) over medium-high heat for five minutes. Place tortillas on warm griddle. Cook 1-2 minutes, until puffed and brown. Cover with towel to keep warm.


Pot Roast Quesadillas

Leftover pot roast
Mozzarella cheese
1 tbsp olive oil
Red peppers
Red onion
Arugula
Salt and pepper, to taste
Balsamic Vinegar, optional

In a small saucepan, heat olive oil and saute red onions and peppers for approximately 3-5 minutes. Set aside.

Place a pat of butter in a saucepan. Place tortilla into the pan, sprinkle some cheese on the tortilla followed by the beef, onions, and peppers; top with more cheese, arugula and finally the other tortilla. Cook until the quesadilla is golden brown on both sides and the cheese is melted. Sprinkle with balsamic vinegar.

All photographs are actual pictures of the recipe listed, prepared by Sweet Treats 'n Good Eats, and cannot be used without the owner’s consent.

Sunday, April 8, 2012

Crockpot Pot Roast


One would never imagine that something so good was so simple. But this crock pot recipe is just that.

One thing I did not intend to do for this Easter holiday is be slaving in the kitchen from sun up to dinner time. So I am going to use the crock pot to make my roast so I can actually enjoy the day with everyone else.

The best cuts of meat for a crock pot are the ones which are toughest when cooked with dry methods. So select a chuck or round roast if you are planning to cook it in the crock pot. If you cook it slow, all of the collagen from the roast melts and turns into gelatin, which makes for a tender, yummy end result.

Tips:
  1. Be sure to let the roast rest for at least ten minutes before carving to allow the natural juices to settle.
  2. Use a knife that has been sharpened before you begin carving.
  3. Carve the roast across the grain at a consistent angle for each slice. This will result in a more tender cut.
Pot Roast

1 3-4lb chuck roast, boneless
Salt and pepper, to taste
Garlic powder
2 tbsp extra virgin olive oil
1 large onion, sliced
1 c baby carrots
3 celery ribs
Mushrooms, optional
3 garlic cloves, chopped
Thyme springs
1 bay leaf
1/4 c flour
1/2 c red wine, beer or bourbon
1 1/2 c beef broth

Heat the olive oil in a skillet until hot. Rub salt, pepper and garlic powder into the roast. Brown the meat on all sides.


Season the vegetables and place them in the bottom of the crock pot. 


Put the meat on top of the vegetables.


With the oil from the browning, place the flour in the pan and whisk until incorporated and slightly browned, stirring constantly. Be sure to get all of the bits from the bottom of the pan. Add the liquids to the pan, whisk and reduce.

Pour the liquid over the roast, into the crock pot. Top with thyme sprigs and bay leaf. Cover and cook until tender, 8 hours, in a slow cooker (or in a 350 degree oven for 2.5-3 hours).

All photographs are actual pictures of the recipe listed, prepared by Sweet Treats 'n Good Eats, and cannot be used without the owner’s consent.

Saturday, April 7, 2012

Mixed Greens


It is Easter weekend and it is smelling like ya grandma's place over here. At my house it is mandatory that every holiday dinner be accompanied by greens of some sort. I love collards, kale and turnip greens so I am preparing some mixed greens with our Easter dinner.

As much as I love greens, my back and my neck don't like the cleaning process. So sometimes I will cheat and purchase the pre-cut greens. And even though they still need washing, it is not as tedious as cleaning, rolling, cutting and removing the stems from buying the bundles of greens. Whew! I am getting tired just thinking about it.


Mixed Greens

24 oz water
2 smoked turkey parts (or ham hocks)
2 lbs fresh greens
1 small onion, diced
2 to 4 tbsp extra virgin olive oil
1/2 tsp paprika
1/4 tsp cayenne pepper
1 tsp crushed red pepper
Salt and pepper, to taste
1/2 tbsp sugar
1/4 c organic apple cider vinegar
16 oz chicken stock

Add water to a large stockpot and bring to a boil. Add smoked turkey parts or ham hock and boil for approximately 30 minutes, to season the water, as you clean the greens and remove the stems.

In a small saucepan, saute onions for about 5 minutes over medium heat.

Add greens to seasoned water, in handfuls, until pot is full. Cover and cook collards down for about 45 minutes. Add onions, olive oil, seasonings, chicken stock and apple cider vinegar. Cover and continue to cook greens for another hour to an hour and a half.

About mid-way through cooking the greens, taste the greens and adjust the seasonings, if necessary.


All photographs are actual pictures of the recipe listed, prepared by Sweet Treats 'n Good Eats, and cannot be used without the owner’s consent.

Peach Cobbler


When I was eating sweets peach cobbler was, hands down, one of my favorite desserts.

I am going to be posting a few items over the weekend that are on my Easter dinner menu...and some of these are totally not on my meal plan; but I am staying true to my sugar free diet. Sadly this peach cobbler will not be on my plate. But, my son and sister are here so I won't bore them with all of my sugar-free treats.

I fondly remember the good ole days when Easter consisted of large family dinners, good food, sunrise service and new Easter suits. And then there was Easter Monday. We would get together with our friends and spend the entire day at Paramount Carowinds theme park. Candy apples, funnel cakes, jelly bellies, turkey legs, Thunder Road, White Lightning, the Cyclone, the water park...those were some good times. But back to reality...and this cobbler.


Peach Cobbler

Crust:
2 c all-purpose flour
A scant tsp salt
1 1/2 sticks frozen unsalted butter, cut into small pieces
1/4 c ice cold water

Combine the flour, salt and butter in a food processor. Pulse until the mixture is the texture of cornmeal. Add ice water and pulse until mixture forms a ball.

Dust the dough lightly with flour and shape into a square. Wrap in wax paper and let rest in the fridge for 30 minutes or longer.


Filling:
4 c fresh peaches, peeled, pitted and sliced
1 1/2 c water

1 tsp vanilla
1/2 tsp brandy
1 1/2 c granulated sugar
1/2 c margarine
1 tbsp cinnamon
Pinch of salt
1/2 tsp nutmeg
 

In a medium pot, cook ingredients until tender, but not mushy. 

Spray a glass baking dish with cooking spray. Add peaches to baking dish. Dot with butter. Place pastry crust over the peaches and cut 4 slits in the top. Brush crust with egg wash.

Bake at 375 degrees for 45 minutes or until browned and bubbly.

All photographs are actual pictures of the recipe listed, prepared by Sweet Treats 'n Good Eats, and cannot be used without the owner’s consent.